
Want to put down epoxy flooring on beat-up concrete? Good choice. Epoxy looks great and lasts, but only with proper concrete prep. Think of it like a house: you can't build on a shaky base. The same is true here.
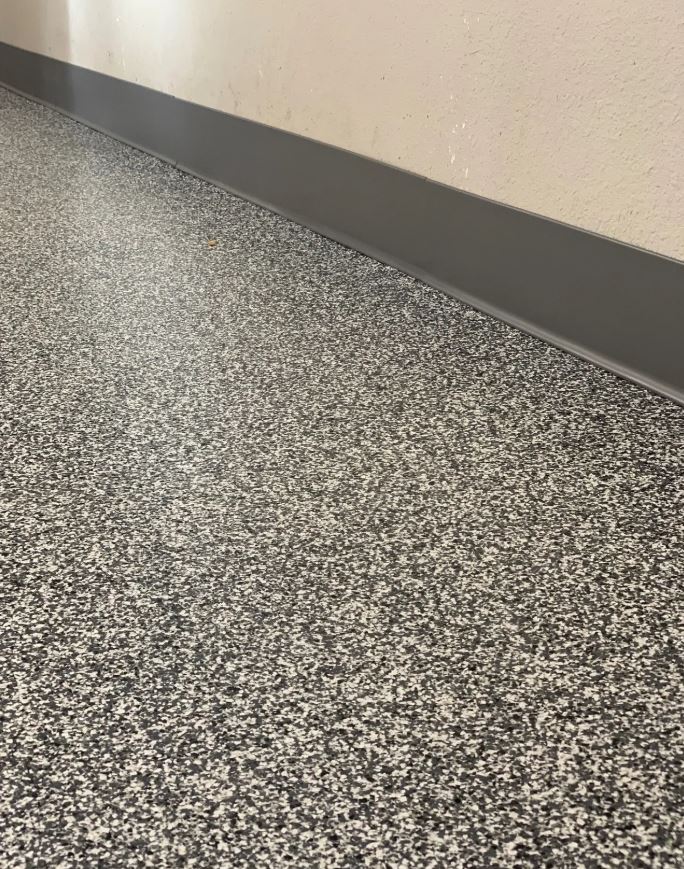
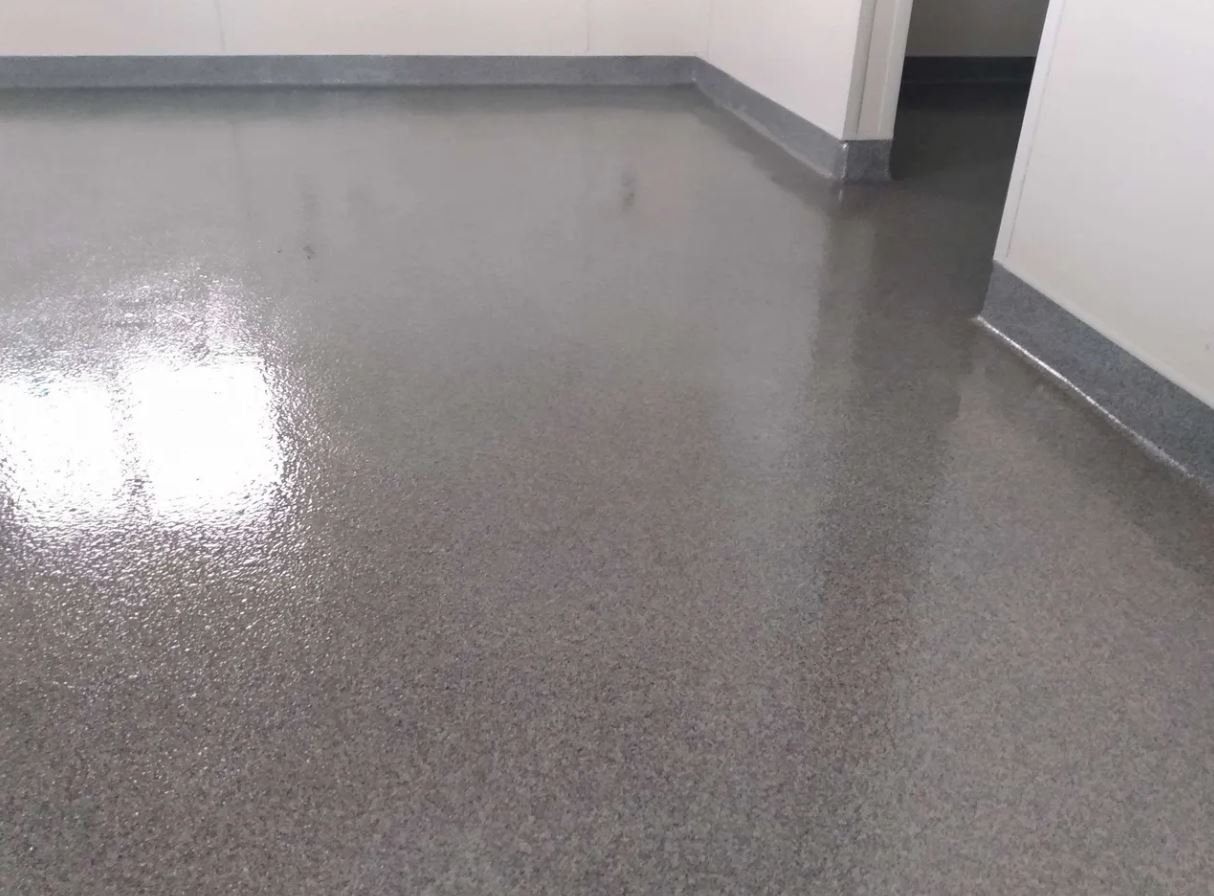
Surface restoration gets your concrete in shape before you apply epoxy. This means grinding old coatings or rough spots. Want a reliable Flooring Contractor in Denver business owners rely on for durable floor coatings.. You might patch cracks or fill holes. It's more than sweeping.
Why do this? Skip it, and your epoxy could bubble, peel, or not stick. You'll waste money and redo the job soon. A prepped surface makes your new floor last.
The process starts with a look to see what you face. Then comes grinding, patching, and maybe a self-leveling underlayment if the floor isn't even. It's a multi-step thing.
A common mistake is not grinding enough or using the wrong patching. You must get the concrete clean, level, and porous for the epoxy to bond. Doing it right pays off.
Let's discuss what happens if you don't prep concrete before applying epoxy. It's not good, and you shouldn't skip this.
Epoxy needs a strong bond with the concrete. If the concrete is weak, dusty, or dirty, the bond will fail. Adhesion failure is common. The epoxy can peel, sometimes in large pieces. Not ideal, right?
Bubbling is another issue. Moisture in the concrete tries to escape as the epoxy cures, creating bubbles. A bad prep job can also cause an inconsistent finish. You might see uneven gloss or blotchy color.
You'll face quality and lifespan issues. The floor won't last, it won't look good, and you'll pay more to fix it. For property owners or investors, a shorter lifespan is a problem. It's not worth the risk. Spend the time and money to do it right.
Doing a concrete surface readiness check yourself may seem good at first, especially if you want to save money. You might think a quick look and a moisture test kit from the hardware store will work. But, DIY checks often miss key things. For example, they might miss small cracks, uneven surfaces, or hidden dirt. These missed issues can cause epoxy floor problems later. Then, you will spend more on fixes.
Hiring pros gives you accuracy that DIY can’t match. Pros use special tools like surface gauges and chloride kits. They may even take core samples to see the concrete's real state. They spot problems you can't see, like alkali reactions or early damage. This careful check makes sure the surface work fits your concrete's needs. That way, your epoxy floor lasts longer and works better.
DIY checks can take more time than you think. A quick task can turn into hours of research. You might spend time reading about tests, understanding results, and fixing surprises. Pros can do a full check faster because of their tools and know-how. This saves you time for other project tasks. Plus, the whole project often finishes sooner.
DIY checks seem cheaper at first. But, mistakes can cost you more in the end. Wrong checks can mean poor surface work. This leads to epoxy issues like peeling or uneven curing. Fixing the whole floor, with new materials and labor, can cost a lot. Pro checks cost more up front. But, they give you peace of mind and stop costly errors. In the end, you save money.
Match your hopes to the check method you pick. If you want a fast home fix, DIY might seem okay. But, get ready for possible problems later. If you own a business or property, a pro check is key. It makes sure the floor lasts and avoids business upsets. Knowing each method's limits helps you make smart choices. Then, you get the floor results you want.
Before you apply epoxy, examine the concrete closely. Visual inspection is your first defense. Do you see cracks or damage? Are there stains that could cause bonding issues? Take notes and pictures. This is where you begin.
Next, check for moisture. Concrete breathes. If too much moisture is trapped inside, your epoxy will fail. Calcium chloride tests are common, but relative humidity (RH) probes are better. Here is why: They give you a more accurate picture of what's happening inside the slab. Aim for readings below the epoxy maker's specs, usually around 75% RH. Skip this step, and expect bubbling and peeling.
Finally, check hardness. You need a solid surface for the epoxy to bond. A scratch test can tell you a lot. Can you easily scratch the surface with a key? That's a bad sign. More exact methods use a tool to measure surface hardness. If the concrete is too soft, you'll need to harden it with a treatment or consider an underlayment to create a stable base. Ignoring hardness is risky. For contractors and managers, these checks are vital. They prevent issues and ensure your flooring lasts longer.
Before you put down epoxy, look closely at the concrete. Really look. It's detective work.
First: cracks. Obvious, right? Note how big they are and how many exist. A few hairline cracks? Maybe not a big deal. Giant fissures everywhere? Big problem. (Image of hairline vs. large crack).
Next, stains. Oil, grease, mystery gunk. Anything soaked into the concrete will hurt the epoxy's grip. You can't paint over that and hope for the best. (Image of oil stained concrete).
Old coatings are another thing to watch for. If old paint or another coating peels, remove it. Otherwise, your new epoxy will peel with the old stuff. Not good.
Finally, check for other things. This could be anything from dust to chemicals. Even if you can't see them, they could be there, so clean the surface well. You might need to scrub, grind, or use a special concrete cleaner. You want a clean surface for the epoxy to bond to. Skip this step, and you ask for trouble. Trust me.
Before you apply epoxy, you must address any damage. We mean surface restoration. Think of it as prepping before painting.
First, check the concrete. Look for cracks, flaking, or any major dents. Grinding will help here. It will smooth the rough spots and remove old coatings or dirt. But grinding alone won't fix everything.
For deeper cracks and holes, you'll need to patch them with a concrete patching product. Be sure to use a product that works with epoxy, or you're asking for problems later. Let the patch dry fully, and then grind it smooth, so it blends with the concrete around it.
Sometimes, the concrete is too damaged. Then, a concrete overlay might be needed. This means putting a thin layer of new concrete over the old surface, giving you a clean surface to use. It's more involved, but it can save you trouble later.
Also, cleaning is key! Pressure washing is a good start, but you might also need a concrete cleaner to remove any oil or grease. These can stop the epoxy from bonding well, leading to peeling and other issues. This part is key for real estate investors focused on long-term value. Skip these steps, and you'll be redoing the floor sooner than you want.
You have concrete and plan to install an epoxy floor. First, ensure the concrete is ready. Check that the surface is hard enough. If it's too soft, the epoxy won't bond well. This can cause the floor to peel or crack. No one wants that.
How do you check hardness? There are simple methods. One is a scratch test. Use a knife to see how easily the surface is damaged. If it scratches easily, that's a bad sign. Another method uses a rebound hammer. You press it against the concrete, and it measures the rebound. A higher rebound means a harder surface. These tools measure the concrete's strength.
Why does hardness matter? The epoxy needs a solid base to grip. Think of gluing something to sand. It won't work. If the concrete is weak, it'll break under stress, and your epoxy floor will suffer. By ensuring surface hardness, you invest in a floor that lasts. You also save money.
Concrete might have some history, like oil spills or chemical splashes. Before you apply any epoxy, you must deal with any contamination. If you don't, the epoxy won't stick, and you'll have peeling. No one wants that.
First, figure out what you're dealing with. Look for stains, discoloration, or a greasy feel. A simple water test can help. If water beads up instead of soaking in, something is blocking the pores.
Once you know what's there, you can pick the right cleaning method. Degreasers work well for oil and grease. Chemical etchers can remove some surface contaminants, but be careful. Always follow the instructions and wear protection. Sometimes, you might need to grind the concrete to get rid of stubborn contamination.
Don't forget testing. After cleaning, do another water test to ensure the surface is porous again. If it's not, keep going. It's better to prep now than redo the whole floor later. This is important in commercial properties where spills and chemical exposure are more common. Skipping this step is a bad idea.
You prepped your concrete surface, but is it ready for epoxy? Surface profile matters for epoxy flooring. It refers to how rough the concrete is. Epoxy needs something to grab. If the surface is too smooth, the epoxy won't stick. This can cause peeling or bubbling.
The ideal profile is often called CSP, or Concrete Surface Profile. CSP numbers vary. The right one depends on the epoxy you use. Your epoxy maker will tell you which to use.
How do you get the right roughness? There are several ways. Acid etching is one choice. It can be hard to get the same results each time, and it needs careful cleanup. Grinding is another common way. Diamond grinders scrape the surface and give you more control. Shot blasting is another option. It uses small steel or abrasive shot to hit the surface and make a textured profile. Shot blasting works well on large areas.
The best method depends on the job size, the concrete's condition, and the CSP you want. Don't skip testing the profile after prepping. Use a surface profile comparator to check that you're in the right range. If not, keep working. This step matters for flooring contractors who want lasting results.
Measuring Concrete Surface Profile for Optimal Coating Adhesion
You have a concrete floor that has seen better days, and you are thinking about epoxy. Good move, but you cannot just apply epoxy to any surface. First, deal with the cracks, holes, and uneven spots. This is the surface restoration work.
Let's discuss cracks. For hairline cracks, an epoxy crack filler works well. Clean the crack, apply the filler, and smooth it. For bigger cracks, you might need to widen them to get the filler in deep. For holes, patching compounds work. Make sure you clean out the hole and prime it if the product instructions say so. Then, pack in the patching compound. Do not overfill it; you want it level with the surrounding concrete.
Uneven surfaces are different. Grinding is the answer here. You can rent a concrete grinder from most tool rental places. Start with a coarse grit and move to finer grits for a smooth finish. Be patient and wear a mask because concrete dust is not good. Self-leveling concrete is another choice, especially for larger areas. Follow the instructions carefully, because if you mess up the mixture, it will not level right.
Why do all this? If you do not, your epoxy floor will look bad. Cracks will show through the epoxy, holes will be obvious, and uneven spots will create a wavy finish. Also, the epoxy will not bond well to a damaged surface, so it could peel or chip. Do it right the first time, and you will save yourself trouble and money.
Before you apply an epoxy floor, you must prep the concrete surface. Really prep it. This means more than a quick sweep.
Think about it: You want something to stick to concrete. If the concrete is covered in dust, debris, or old coatings, the epoxy isn’t bonding to the concrete. It's bonding to the *stuff* on the concrete, which will let go.
So, what does proper prep look like? It starts with a good cleaning. Vacuum, especially to get into the concrete's tiny pores. Sweeping works for the big stuff, but a vacuum gets the fine dust you can barely see.
Pressure washing is another step, especially if grease, oil, or other contaminants are on the surface. You might need a degreaser or concrete cleaner, depending on what you're dealing with. Just rinse well.
Why all the fuss? If you skip these steps, you set yourself up for failure. The epoxy might bubble, peel, or not stick. Then you're stuck with a floor that looks bad and needs redoing. All that time and money wasted. Clean it right to save yourself a headache.
When figuring out if your concrete floor is ready for epoxy, pros use specialized tools. They go beyond just eyeballing it. For example, moisture meters check the concrete's internal dampness. This is super important because epoxy and moisture don't mix. Surface profile gauges measure the texture of the concrete. Epoxy needs some roughness to grab on tight. Hardness testers tell you about the concrete's strength and if it's too weak to support a new floor.
You might be thinking, "Can't I just get these tools myself?" You could, but professionals know how to use them correctly. More importantly, they know how to read the results. It's not just about getting a number. It's about understanding what that number means for your specific flooring project.
Here is why: a bad assessment can lead to epoxy failure. Peeling and bubbling can cost more to fix than if you'd just hired a pro to assess it. Trying to save a few bucks upfront can cost you more later. A professional assessment is often a better value because it helps avoid mistakes.
Let's discuss the money side of prepping your concrete for epoxy. You have two main choices: DIY or hiring a pro. Both involve costs, but they differ.
DIY looks cheaper at first. You buy materials like concrete patch, maybe a grinder, cleaning supplies, and safety gear. This could be a few hundred dollars, or more if your floor is in bad shape. But your time is the real cost. Concrete work is hard. It takes time to learn, time to do the work, and time to fix errors. And errors will happen. If you mess up the prep work, the epoxy won't stick. Then you must do it all over. That wastes money and time.
Professionals cost more at the start. You pay for their skills, their equipment, and their work. A good assessment can cost a few hundred dollars, but it's useful. Pros will see problems you might miss. Surface prep, like grinding, patching, and cleaning, can easily cost several dollars per square foot. That seems like a lot, but they do it right the first time.
Here is why: DIY is like buying a cheap tool that breaks during the job. A pro is like buying a quality tool that does the job well. Also, if they mess up, they fix it. With DIY, you are on your own. Fixing concrete errors can get expensive fast.
Assess the concrete's porosity to determine its ability to absorb the epoxy coating. Perform a water drop test or use a concrete moisture meter to gauge the surface's absorption rate. Highly porous concrete may require a primer or sealer to prevent excessive epoxy absorption, while dense concrete may need mechanical abrasion to improve bonding. Understanding the concrete's porosity ensures proper epoxy application and a durable, uniform finish.
Concrete surfaces often harbor contaminants such as oil, grease, dust, and previous coatings that can hinder epoxy bonding. Employ aggressive cleaning methods like pressure washing, scrubbing with detergents, or media blasting to eliminate these substances. Ensure the surface is completely dry and free of any residual cleaning agents before proceeding. This step is vital for achieving optimal adhesion and preventing future coating failures.
Begin by thoroughly examining the concrete surface for any visible flaws like cracks, spalling, or unevenness. These imperfections can compromise the epoxy's adhesion and overall performance. Documenting these defects with photos and notes helps in planning the necessary repairs before epoxy application. Proper surface preparation is crucial for a long-lasting and aesthetically pleasing epoxy floor.
The condition of your concrete determines the best epoxy flooring system. That makes sense. You can't apply just any epoxy to any surface and expect lasting results.
First, consider moisture. Check the concrete's moisture content. Too much moisture causes epoxy to bubble, peel, or not stick. Rent or buy moisture meters, or hire someone to test it. Don't skip this!
Next, think about the concrete's hardness. Is it soft, or is it solid? This affects the epoxy's bond. A harder surface is a better base.
Finally, what kind of traffic will the floor endure? Will cars drive on it? Will forklifts? Or will people simply walk on it? Heavy traffic needs a thicker, tougher epoxy system than light traffic. Match the product to its use. Otherwise, you waste money and create future problems.
Let's explore how surface restoration works in the real world. Seeing is believing. Think about that old warehouse downtown with the cracked, oil-stained concrete floor. We applied an epoxy coating there last year. The secret? We did a lot of grinding to remove the old gunk and level the surface. Then, we patched all the cracks. Without that prep work, the epoxy would have highlighted the problems and peeled quickly. Now, it’s a showroom floor that handles forklifts all day.
Or, think about a smaller project. A homeowner wanted an epoxy floor in their garage. Simple, right? The concrete had years of salt damage from winter cars. We used a special concrete grinder to remove the top layer and neutralize the salt. *Then* we applied the epoxy. They skipped this step in their last garage, and it wasted money. Now, it looks great and will last.
The main idea is that you must address the concrete's condition, whether it's a large commercial space or a home garage. We recently worked at a local brewery. They wanted a durable, easy-to-clean floor in the bottling area due to sugary spills. We shot blasted the concrete to create a surface the epoxy could grip. It’s been over a year, and it still looks new. No peeling, no chipping, no problems. Surface restoration isn't just an extra step; it determines whether your epoxy floor succeeds or fails.
Let’s talk about common mistakes people make when prepping concrete for epoxy. You want to avoid these. First: not cleaning well enough. Clean *really* well. This isn't a quick sweep. You must remove all old coatings, grease, oil, and dirt. Everything. If you don't, the epoxy won't stick, and you'll end up with peeling and bubbling. Nobody wants that.
Another big mistake is improper profiling. The concrete surface must have the right texture for the epoxy to grab. If it's too smooth, the epoxy has nothing to hold. If it's too rough, you'll use too much epoxy trying to fill the gaps. Grinding usually works best, but use the right grit and technique.
Also, don't forget to patch cracks and holes. People skip this. If you don't fill those in, the epoxy will sink into them, and you'll have weak spots. Use a good concrete patching compound and let it cure before you start with the epoxy. A little extra prep work saves you headaches later.
Surface restoration matters when you work with older concrete. This means grinding down high spots or old coatings. Patching cracks also matters. The aim is to get the concrete as close to perfect as possible before you apply epoxy.
Why do this? Epoxy is only as good as its base. If you skip the prep, you invite problems. Bubbles and peeling can occur.
The workflow often looks like this: First, check the damage. Then, grind or shot blast the surface. Next, patch any flaws. Finally, apply a concrete resurfacer if needed.
One mistake is not grinding enough. People think a quick pass is enough, but it isn’t. You must open the concrete pores so the epoxy can grab on. Also, use good patching material. Use something for concrete repair, not just filler. Do it right, and your epoxy floor will last. Skimp, and you redo it sooner.
Surface restoration revives old concrete. Grinding smooths high spots. Patching fills cracks. A skim coat creates a smooth surface. It's like a facelift before the epoxy.
Why do it? New epoxy on damaged concrete is like a house on a bad base. It looks good at first, but it won't last. Expect cracks and peeling.
The process starts with a check. What's the concrete's condition? Are there cracks? Is the surface uneven? Once you know the issues, plan your work. Grinding removes old coatings and levels the surface. Patching fills imperfections. A skim coat makes a smooth base for the epoxy to bond.
Skipping this step causes problems. You might save money now, but you'll pay later with a failed floor. For owners, investors, contractors, and managers in Denver, that means wasted time and money. Doing it right ensures your epoxy flooring pays off.
Restoring a worn concrete surface takes skill. It often means grinding down high spots, patching cracks, and applying a cement coating to create a smooth surface. It’s a multi-step job, and each step must be correct.
Why do it? A restored surface makes your concrete last longer. More importantly, it gives your new epoxy flooring the best base possible. You would not build a house on a cracked base, right? The same idea applies here. Poor prep work can cause problems.
Knowing what restoration work you need matters, too. Are there a few hairline cracks, or is there major damage? The answer guides the entire process. A professional can help. They can spot issues you might miss and suggest the correct fixes.
Concrete restoration can be hard. If you do it wrong, you could get an uneven surface, adhesion issues, or more cracks later. It’s often best to hire pros. We have experience, and we know how to do the job right.
Call us today at 555-555-5555, or visit our website at www.example.com to set up a free meeting and get a price quote. Let us check your concrete and give you confidence that your new epoxy floor will look good and last.